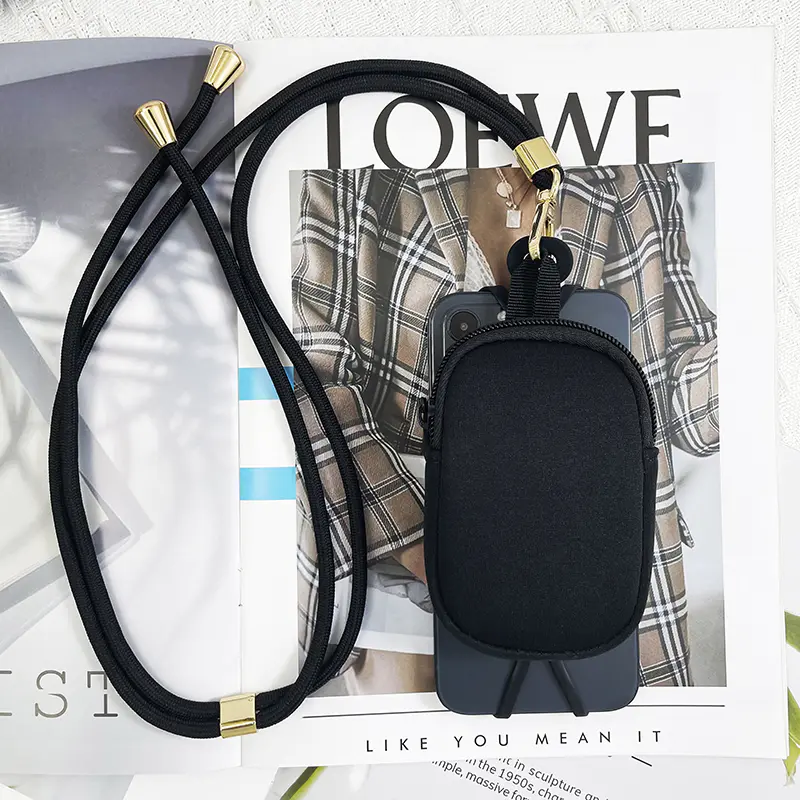
How to re-decorate the case with paper and mod podge! ( Flash optional) I\'m a huge fan of Harry Potter, ever since my phone (an HTC One) Interesting case options are very limited and I made one myself! The picture above will show my HTC case ( Complete the flash and Harry Potter page with badges) Or my husband\'s iPhone case ( He drew an alien and replaced the flash with a black paint border) This whole process is very customizable so you can decide what you want on your phone case and it can work with any type of phone case. You need: 1. Case you want to renovate For my HTC One case, I used a free old silicone case when I bought my phone last year. This is like the one I used: for my husband\'s iPhone case, I used the old iPhone Hogwarts badge case I had from the time I owned the iPhone. The inside is made of silicone and the outer shell is made of plastic. I only decorated the plastic case. This is from here: the print design of your choice. I scanned my favorite Harry Potter and Deathly Hallows page and printed it out on regular 8 pages. Print 5 \"x 11\" print sheets with my home printer. You can use almost anything, but if your case is too heavy, I would suggest not to print it on the card (like mine) Not exactly flat. I also don\'t suggest you cut a few pages from your favorite book, and you may want to read it again one day; ) We printed his cool alien painting for my husband. 3. Mod Podge. I used a gloss like this. You can also choose matte or whatever you like! I suggest you use gloss if you choose to use any flash. Otherwise, the flash may not be very shiny. When I make it again, I may make a matte on the page and shine on the flash. I know some people will make their own Mod Podge, but I \'ve never tried it, so I don\'t know what the result will be! 4. Pen/pencil (not pictured)5. VERY sharp x-acto knife (or similar)6. Prepare cardboard or floor mats for the restaurant. Scissors8. Paintbrush ( I recommend a bubble. Type brush but I used what I already have)9. Q- Warm Tip/cotton bud 10. Towels or paper towels (not pictured)Optional:1. Glitter (extra fine) Choose in your color. If you choose not to use the flash but want a border of different colors, please draw. Cardstock ( Make a badge like the Death Hallows symbol I made)4. Precautions for waterproof glue *: Design ( But not the process) Because my Harry Potter case was inspired by etsy: she doesn\'t allow you to choose the page you want ( This page is my favorite part). Also, I would really like to shine on the side and lift the badge! So I did it myself. She looks very professional, so I\'m sure she\'ll be happy to do one for you if you don\'t want to do it yourself! I don\'t know what process she uses to make her, but this tutorial is my way :) Case: Clean the case with mild soap and water to remove any oil/dirt. Dry thoroughly. Printing: printing the design on the back of the phone case on ordinary printer paper (2- If you want a test cut or two, 3. outs). Let the ink dry. Optional: If you are going to use a badge like my Deathly Hallows, print the badge directly to the thick card if you can. My printer doesn\'t have this feature, so I print it on plain paper and cut it down and trace it to the card. Tracking and cutting: place the design of the page you want face down on the table and place the phone case (back side down)on top. Watch carefully from below to make sure it fits exactly the shell design you want. Track the outside with a pen/pencil and cut it with scissors. Don\'t worry about cutting out any holes just now for the camera etc. Cut the shape on the back of your phone as shown above. When you lift it to the back, it will most likely be a little big, so just trim it as needed. Since my case is not completely flat, I cut my design to be slightly smaller than the back so that once it\'s time to use the mod podge, it bends around it better. It may take several attempts to achieve the way you want it, so I really recommend printing at least two copies of your design so you can put the first one as a trial, second as the final version. Optional logo: If you are going to use a logo like The Deathly Hallows, place the card with the logo on your meal mat or cardboard. Use an x- The Acto knife carefully cuts any details you want to see once it is pasted to the top of the other designs. ( I just cut the outside of the triangle design with scissors and then use x-acto knife. ) Note: If you have never used mod podge before, here are some helpful tips. 1. The Mod podge is based on water, which means that it will dissolve in water even if it is dry. It\'s very useful if you mess it up and put it where it shouldn\'t be. It was really easy to clean up. If you drop your phone in the toilet, it\'s not that useful ( In this case, you will have a bigger problem than in the case of bankruptcy. ) If you are worried that it is often wet, you can seal the whole thing at the end with a waterproof sealing paste. 2. Mod podge is white when wet and a bit opaque. Don\'t worry it will ruin your design. It will dry. 3. If you use flash powder, I suggest you put some mod podge into a separate container so you don\'t have to worry about polluting your entire bottle of mod podge with flash powder ( Unfortunately, I know this from experience)! Whether you use paint or flash, you should try to get the front edge ( The second picture above) Try not to touch too much in it that will touch your phone. I\'m not worried about this phone because this hard case will go through the silicone case before entering the phone, so if I mess up the inside, no rough paint or mod podge will touch the phone. At all drying stages, I would suggest having it dry on small things that have just come into contact with the inside of the shell to dry ( See the last two pictures above); I just used that little flash bottle. * I repeat and let it dry completely between all paint layers or mod podge! You will thank me :) Choose one, neither of them or both :- Flash options: 1. Use your brush to draw a thin layer of mod podge around your box border (pictures 2- 4 show paint instead of mod podge and glitter, but this is where you want to put glitter too, so the same thing applies) , Pay attention to spread as evenly as possible. Don\'t worry about putting it in the back, because the design will eventually cover this up anyway. ( The first picture above shows what the border will look like after it is completed)2. Sprinkle sparkling wet borders on your cardboard mat to make sure everything goes well. Alternative: an alternative to step 1 and Step 2 is to mix the mod podge with the flash and paint on the sparkling mod podge mixture. This will produce a uneven texture, and the layering like above will be smoother. Mod podge also sells pre- Made the sparkling mod podge but I never tried it. 3. Use a q- Tips for removing excess glue and flash from headphones/chargers etc. holes. 4. Dry thoroughly (15-20 minutes). If the mod podge is transparent and is no longer white, you can see that it is dry. 5. Repeat steps 1-4 if desired. I don\'t recommend the third tier though, because after enough layers, if the buttons get stuck glistening, they\'re hard to push down. I made two layers of flash. 6. After very dry, add another layer of mod podge to seal in the flash. 7. Wash your brush clean so that there is no flash in your design. Try to get any loose flash from your box and work area so your design will be like a flash -- Free as possible ( Because the flash does have it all over the place, polluting everything, my brother so rudely calls it \"herpes in the craft world\", but I don\'t care. I love sparks! lol). Remember, the water will dissolve the mod podge, so don\'t wet it while trying to clean it! Tip: you can put all the excess glitter back into the container with a meal pad or cardboard and save all the magic! :) Optional: If you use a badge like The Deathly Hallows, you can add a flash to the badge using all the steps above if needed. I used three layers of flash on my badge, so it will be very raised on the back of the case. -Paint option: (pictures 2-4)1. If you want to draw, just apply the coating you want on the border and front edge ( Drying). I made two layers of acrylic paint for my husband\'s phone. Use a q- Tips for removing excess paint, especially in holes. * If you put a design on a box that already has a design, as I designed for my husband, you can choose to make a coat of paint as a primer before gluing the design. Printer paper can be seen- Wet once. I decided to give it a try and see how it dries without a primer. 1. Make sure the boundary is very dry, apply a thin layer or even a layer of mod podge on the entire back of the case ( But not the border) With a clean brush (picture 1). By printing and cutting Design on a damp mod podge and line it up as much as possible. 2. Use q- Prompt to wipe any excess mod podge, etc. from the side or below of the camera hole (picture 2). The design will cover your camera hole like the picture above, but it doesn\'t matter now. 3. Let it dry thoroughly. This will take the longest time because the mod podge is not exposed to the air. It will take me about an hour and a half to dry at this stage. 4. Apply a thin layer of mod podge on the entire back of the design ( But not on the border). Again, make sure to erase any excess mod podge with q-tip. Optional logo: If you are using the logo, it is time to press it. 5. Let it dry thoroughly. 6. Make sure it\'s dry and turn the case upside down to your floor mat or cardboard. Cut out any holes carefully (for camera etc) Very sharp x The acto knife as shown in the fifth picture above. This is the easiest at this stage, because the design should be rigid enough not to tear when cutting, and, in the absence of design bends or holes in the wrong place, it\'s easier to cut out the precise area. 7. Paint 1-2 more layers ( Drying) The entire back, including the border, has a model that seals everything together well. I would suggest at least two layers if you use the badge. Make sure you use q- Tips for clearing any excess mod podge before each layer dries. 8. Wipe any excess flash or glue with a slightly damp towel or tissue ( Be careful not to wet the outside). Optional: waterproof sealing cream can be used if necessary. Use according to product instructions. ( Since every waterproof product is different, I will not guide you in this regard. )9. Let it dry overnight before putting in the phone so the mod podge layer doesn\'t get dirty or torn. The first day may feel a bit sticky/cheesy, but this should go away once it\'s really dry. However, I live in a very dry environment and have not tried it in a wet environment. If you live in a very humid place, I would consider adding waterproof sealing material to the top of the mod podge. Enjoy! :)
Hello! please contact us by mail tc@sztenchen.com or whatsapp +8613823763835 if we are not here, thanks Hello! please contact us by mail tc@sztenchen.com or whatsapp +8613823763835 if we are not here, thanks
hello! this is Tenchen company, welcome leave your message, we will contact you soon