A brand new wonderful begining
leather cell phone/iphone belt case
by:TenChen Tech
2019-10-25
The leather phone or iPhone case is a very practical leather processing project and is quite easy to make.
For example, this leather craft item is easier than the leather knife sheath, but there is still good practice in cutting, wet cutting
More difficult projects in the future need to be shaped and stitched.
In order to make this case, you need paper to make patterns, needles, wax lines or artificial muscles, a spatula or other cutting tools, ways to punch or drill holes in leather, glue and leather.
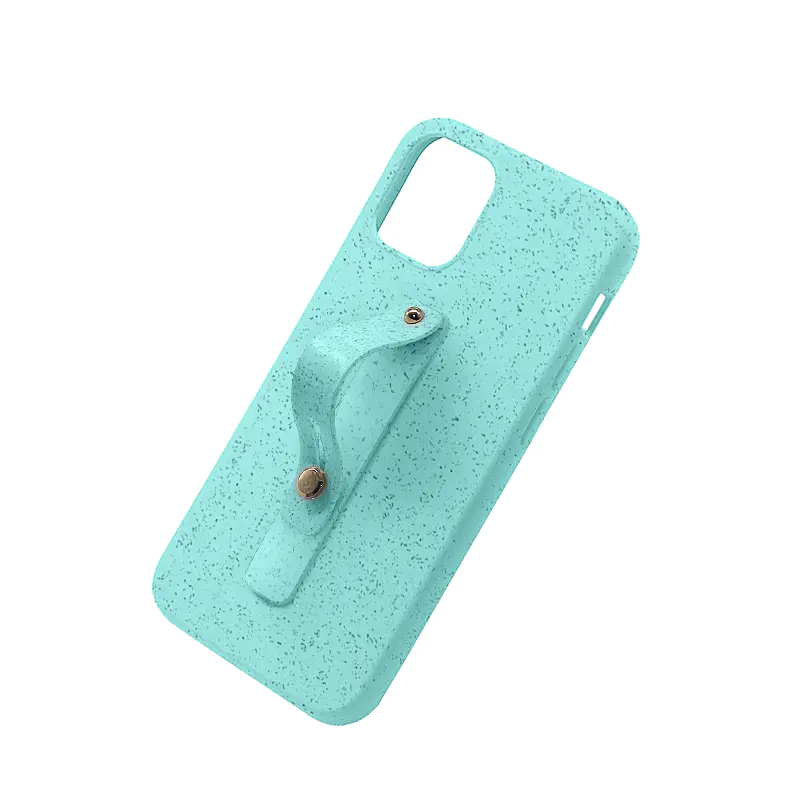
This is going to be-piece wrap-
The case of the mobile phone is made of a piece of leather.
The top will fold back to form a belt ring and the right side will fold on the phone to make the bag. (
I apologize for the quality of the photos-
They are not so good. )1)
Depending on the size and shape of the phone, make a pattern similar to the one shown in picture 1 on paper.
You can try to draw it in leather if you want, but it\'s a very expensive mistake if you\'re wrong!
Cut the pattern on the leather.
You can track the outline of the pattern on the leather, then cut it down, or stick the pattern on the leather with a small pin and cut it down.
Thick paper or cardboard patterns help keep it in place and provide a solid surface to cut.
Under the pressure of your knife, a normal paper pattern will put pressure on you.
It\'s wet now.
Mold the leather onto the phone.
Wet the leather, either put it under the tap for a minute or two, or put it in a container that holds water and let it soak for a few minutes.
Packing your phone is a layer of plastic wrap or something to prevent it from getting wet.
Once the leather is wet enough, place the phone on the back of the leather and wrap the front around the phone to maintain a good fit.
Start forming the front tightly onto the outline of the phone.
Make sure the edges are tight and as close as possible to the back of the phone.
In addition, fold the belt ring to the desired position and work all the way to keep it in place.
Keep working until the leather dries a bit and it keeps the shape of the phone even if you remove it.
If you\'re not in a hurry, let it dry for at least a few hours, overnight.
The extra leather on the edge can now be cut off if needed, or you can wait until the case is sewn together if you wish.
Once the leather is fully dry, stick the lower edge of the belt ring to the back of the case with glue or cement, leaving enough space for the belt to slide easily.
By using groover, calipers, compass, or any other means to mark the position required for stitching, these methods can mark a line that maintains a constant distance from the edge of the workpiece.
The stitching position should be arranged in patterns such as squares, diamonds, triangles, or similar patterns.
As you can see in the photo, I did this very quickly, just ran a line at the bottom of the ring and then tied it to the main stitching on the main body of the box.
This works fine, but it will be safer to use a better stitching pattern. Punch (
Drill if necessary)
Holes stitched with ice cone, leather cone, punch press, drill bit or dremel tool.
Stitch the belt ring to the back of the box where you find the hole.
Use saddle stitch to stitch it-most of the other traces are not sure enough for hard use.
I use a saddle needle for everything.
Stick the front edge to the back and clamp or weigh the edge until the edge is fully dry.
Make sure where you want to put the stitching on the case, which may be as close to the damp
Mold parts as much as possible.
Just like the belt ring, create a visible line to show where the stitching should run.
Once you have this line, mark where the hole should go along it.
The leather spacing tool is the best, but a small nail, fork or anything that can be impressive will work.
The idea is to make sure that the mark for each hole is kept at a constant distance from the next hole so that your stitching will look good.
This is the last major step-you will sew the case together.
Drill holes or punch holes in the leather you mark holes.
Thin ice cone is one of the best options and a good thin cone.
Now sew the edges with a saddle, starting at the bottom and stitching towards the top.
Once you get to the top, sew back a few holes and lock the stitches in place.
Now that the case has been filed, you can close it if you want.
You can dye it, seal it, and polish the edges.
The phone case in the photo was not finished with death and edge polishing but I gave this case to my dad as he needed something right away.
Leather Products is a good hobby!
For example, this leather craft item is easier than the leather knife sheath, but there is still good practice in cutting, wet cutting
More difficult projects in the future need to be shaped and stitched.
In order to make this case, you need paper to make patterns, needles, wax lines or artificial muscles, a spatula or other cutting tools, ways to punch or drill holes in leather, glue and leather.
This is going to be-piece wrap-
The case of the mobile phone is made of a piece of leather.
The top will fold back to form a belt ring and the right side will fold on the phone to make the bag. (
I apologize for the quality of the photos-
They are not so good. )1)
Depending on the size and shape of the phone, make a pattern similar to the one shown in picture 1 on paper.
You can try to draw it in leather if you want, but it\'s a very expensive mistake if you\'re wrong!
Cut the pattern on the leather.
You can track the outline of the pattern on the leather, then cut it down, or stick the pattern on the leather with a small pin and cut it down.
Thick paper or cardboard patterns help keep it in place and provide a solid surface to cut.
Under the pressure of your knife, a normal paper pattern will put pressure on you.
It\'s wet now.
Mold the leather onto the phone.
Wet the leather, either put it under the tap for a minute or two, or put it in a container that holds water and let it soak for a few minutes.
Packing your phone is a layer of plastic wrap or something to prevent it from getting wet.
Once the leather is wet enough, place the phone on the back of the leather and wrap the front around the phone to maintain a good fit.
Start forming the front tightly onto the outline of the phone.
Make sure the edges are tight and as close as possible to the back of the phone.
In addition, fold the belt ring to the desired position and work all the way to keep it in place.
Keep working until the leather dries a bit and it keeps the shape of the phone even if you remove it.
If you\'re not in a hurry, let it dry for at least a few hours, overnight.
The extra leather on the edge can now be cut off if needed, or you can wait until the case is sewn together if you wish.
Once the leather is fully dry, stick the lower edge of the belt ring to the back of the case with glue or cement, leaving enough space for the belt to slide easily.
By using groover, calipers, compass, or any other means to mark the position required for stitching, these methods can mark a line that maintains a constant distance from the edge of the workpiece.
The stitching position should be arranged in patterns such as squares, diamonds, triangles, or similar patterns.
As you can see in the photo, I did this very quickly, just ran a line at the bottom of the ring and then tied it to the main stitching on the main body of the box.
This works fine, but it will be safer to use a better stitching pattern. Punch (
Drill if necessary)
Holes stitched with ice cone, leather cone, punch press, drill bit or dremel tool.
Stitch the belt ring to the back of the box where you find the hole.
Use saddle stitch to stitch it-most of the other traces are not sure enough for hard use.
I use a saddle needle for everything.
Stick the front edge to the back and clamp or weigh the edge until the edge is fully dry.
Make sure where you want to put the stitching on the case, which may be as close to the damp
Mold parts as much as possible.
Just like the belt ring, create a visible line to show where the stitching should run.
Once you have this line, mark where the hole should go along it.
The leather spacing tool is the best, but a small nail, fork or anything that can be impressive will work.
The idea is to make sure that the mark for each hole is kept at a constant distance from the next hole so that your stitching will look good.
This is the last major step-you will sew the case together.
Drill holes or punch holes in the leather you mark holes.
Thin ice cone is one of the best options and a good thin cone.
Now sew the edges with a saddle, starting at the bottom and stitching towards the top.
Once you get to the top, sew back a few holes and lock the stitches in place.
Now that the case has been filed, you can close it if you want.
You can dye it, seal it, and polish the edges.
The phone case in the photo was not finished with death and edge polishing but I gave this case to my dad as he needed something right away.
Leather Products is a good hobby!
Custom message
Related Products