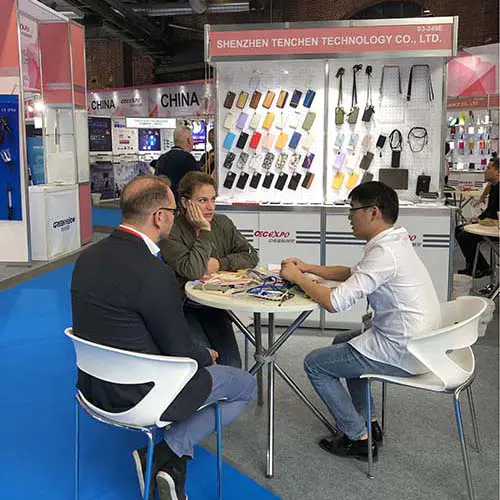
Chinese New Year Holiday Arrangment!
xbox 360 red ring of death fix - how to guide
by:TenChen Tech
2020-03-14
Learn how to fix the red fire ring with my Xbox 360 fix guide. Regarding the Red Death ring or other Xbox 360 bug, the worst thing is that they won\'t go anywhere until you fix it.
In this informative article, I will show you how to fix the Red Death Ring error on your own.
The methods described in this article are very easy to understand.
Before we go ahead though, let me warn you that if you still have a valid warranty, you should strongly consider sending the Xbox back to Nintendo for them to fix it.
Following these steps will void your warranty.
However, if your warranty has expired, this guide will show you an accurate step-by-step action plan to permanently fix red death ring errors.
Not only can this save you money, it can also save you a lot of time.
How to repair the dead red ring-A Step-by-
There are two important steps to narrow down your Xbox: 1)
Disassemble Xbox 360 case2)
Clean up and fix GPU and CPU processing unit what you need: Xbox 360 with red death ring error!
A narrow, thin tool such as a small screwdriver or cone. A screwdriver.
Polaris, you can find a hot compound at any computer hardware store for $1$2.
What is the reason for the Xbox Jingdong red ring?
We have to find the reason before we can find a solution to any problem.
Basically, the red ring of death or RRoD is a sign of \"general hardware failure.
\"There are three red lights or three red rings near the power button.
When GPU (
Graphics processing unitbecomes loose.
The GPU is installed on the motherboard and the GPU becomes loose when the motherboard is heated.
At this time, the green light turned into three flashing red lights.
The vibration of the system usually relaxes the welding of the GPU, which freezes the Xbox 360.
Now let\'s take a look at some specific steps to fix this bug.
Are you ready to start?
The hard drive is a gray thick block on one side of the Xbox 360 console.
Easy to remove;
There is a release button at the top of the drive that you can press and then you just need to pull it gently.
You can put your thumb on the gap of the panel and pull the panel.
Now remove the two gray heating racks on both sides of the chassis.
Each heated grill has six labels.
To loosen the grill, press these inward to the console.
You may need to use narrow tools such as awl or screwdriver to push into these labels.
For the heated grill behind the hard drive, push two labels on the side of the elevated section.
After releasing these tabs, you can push each of the other four tabs in and carefully remove the heating rack from the front to the back.
This is the step you take to remove the warranty because to remove this heating rack you will eventually have to pierce the plastic film behind one of the labels.
The Xbox 360 case consists of two components connected along a single seam.
You want to remove the bottom shell.
First, look at the Xbox 360 chassis.
You can split the seams one side at a time and gently pry open the four clips that put the two parts together.
You can separate the sides with a screwdriver or awl so that the clip does not reengage.
Poke the small rectangular hole on the back of the console with a thin tip screwdriver.
You should hear clicking when you poke each rectangular hole.
You should now be able to lift from the entire plastic bottom of the console.
There are 22 screws (
8 Black 14 Silver)
In the metal case under the plastic case, you just raised it.
Unscrew all of this and put them in a safe place so you don\'t lose anything and remember who went there.
Once done, turn the right side of the entire Xbox 360 up again and remove the remaining plastic case.
Now that you can see the inside of the Xbox 360, the first thing you have to do is take out the DVD drive.
Unplug the cable connected to the DVD drive from the motherboard and related small devices and remove the DVD drive.
Make sure to unplug the cable from the other end of the cable and remove the cable.
It\'s simple to get the fan out.
First of all, you need to remove the fan cover, which is a plastic cover in a stylish shape.
You can do this by twisting it gently until it comes off.
The fan shield is clipped to the fan itself in one place, so be careful not to break the clip.
Then unplug the fan.
First, you need to remove the plastic cover on the front of the RF unit.
It was caught and pulled down easily.
Remove the RF unit by unscrewing the black screws in each corner and lifting them up.
Now you can gently lift the motherboard from the Xbox 360 chassis.
The GPU and CPU processing units are located under two radiators.
To reach them, remove the radiator by flipping the motherboard and screwing down the x clamp.
There are four screws per x clip.
Screw them down while keeping the boards vertical, so that when the boards are only partially screwed down, the weight of the radiator does not break.
After removing the x clamping screw, you can remove each radiator and expose the processing unit below.
I suggest you don\'t worry about this step.
Please follow all the steps carefully so as not to damage the Xbox 360.
The next step is to clean up the GPU (
Graphics processing unit)and CPU (
Central processing unit).
This is a very important and critical step. Use a Q-
Wipe the tip or cotton swab with alcohol and thoroughly clean the surface of each unit.
The rest of the motherboard may also be covered with accumulated dirt or dust.
You can gently wipe the motherboard with a dry cotton swab to remove excess dirt.
Now, you need to gently apply some northern Silver thermal compounds on the GPU and CPU.
Once you apply the northern Silver, spread it over a thin layer of processing units with your finger or thumb, as shown in the picture above.
Before reconnecting the radiator, the last step is to remove any remaining dirt or dust from the bottom of the radiator.
Then tighten the x clip back to the motherboard.
Put everything back together and see if it fits.
The most important part of removing the Xbox 360 is to remember where everything goes!
So please make sure to re-assemble the Xbox in the same steps as taking apart the Xbox, but instead.
Now, turn on your Xbox 360.
I always like to educate people.
So I tried to describe the whole process in my words.
Video can make the whole process easier.
I suggest you visit my website if you need more help, which will definitely help you to fix the XBOX 360.
You can find a link on my hub pages profile (
Just click on my small picture in the upper right corner).
The inspiration for MeI came from my love for Xbox and Microsoft\'s carelessness, which caused me a huge loss.
When my Xbox 360 freezes and there are three red lights near the power button, everything starts.
I am very frustrated as a game lover and can\'t play my favorite game!
I did some research on the Internet and checked out some Xbox 360 forums where I learned it was an RRoD or red death ring error.
A friend of mine recommended a professional Xbox 360 repair guide.
I have no other option other than to purchase this guide as my Xbox 360 device warranty has expired and I don\'t want to give $140 to Microsoft support center and wait two months to fix the console.
After using the repair guide, I solved the problem with the Red Death Ring in just two hours.
Knowing that my Xbox 360 is working again, I\'m ready to enjoy my favorite game, which is an amazing feeling.
A few days later, I was able to solve the same problem with my friend\'s Xbox 360 device.
Now, I \'ve been helping people with the Xbox 360 issue.
Since then, I have solved many deaths in my community.
Custom message
Related Products